Monday, December 28, 2015

Holiday attire

Hey Everyone,
I know its been a long time since Ive been around these parts. I have had so much going on in my life and just haven't had the time to blog or sew. I was however,  able to squeak a garment out in time for my company Christmas party this year. I actually started out making a different dress but it didn't turn out so well. So I had to change directions and because time was limited I had to make something I could do basically with my eyes closed.

First, I decided not to make a dress and settled for one I had previously made for my Anniversary last year. Its an all time favorite V1314 blogged about here  It was a perfect holiday color in a nice emerald green. I have made this dress several times and still really love it.


V1314
I decided to add a little bling with one of my all time favorite patterns M6844
Ive made this garment several times so I won't go into a lot of detail here. I made the bodice with one type of sequin and had to do the flounce in a totally different sequin because I ran out. But in my opinion it doesn't look bad.
M6844 in sequin
I lined the bodice and sleeve because the sequin was pretty lightweight. I made View C.

 
   In addition to the jacket I had enough fabric left over to make a clutch. I loved the combination

M6844 and V1314

I loved the combination together.
Hopefully it will not be so long before I return.
Chat with y'all later

Tuesday, August 18, 2015

August Miscellaneous makes: 2 year UFO, a stripes saga and a basic pencil skirt.

Hey Y'all
This post is dedicated to a few garments that I didn't think needed a whole blog post by themselves.

1st up:
I have many garments hanging in my home office closet, which is where I sew ( I sew in the home office, not the closet lol) that for one reason or another didn't make the cut but instead of throwing them out I've kept them to revisit at a later time to see if I could make it work.
Enter McCalls 6558 I attempted this dress over 2-3  years ago near the time I first started sewing. I was attempting to make view E but with the ruffle from view B but, somehow got overwhelmed when I sewed the ruffles on backwards and upside down.. and it got thrown in the deep dark dungeon with the rest of the unfinished projects that I didn't have the energy to figure out or finish.
I had to chuckle when I pulled this dress out because looking at attaching a ruffle to a dress now doesn't seem very difficult at all but when you are just starting out, and not very skilled at reading patterns well...
I ripped the ruffle off to reattach correctly and afterwards realized I really didn't care for it now. I went with View E, the elasticized top. It was simple, took me all of 30 minutes because the skirt was already complete. I wish I could have lengthened the bodice by an inch or so but the only fabric I had were the 2 ruffles and I had to cut a front and back bodice from that . Nothing spectacular. But it is a cute little dress.
Made from a Teal/Mint striped gauze that frays like crazy that I believe came from Walmart. Its a size 14.      


(


2nd Up: 
So I tried my hand at the beauty of a pattern that is McCalls 7121.   M7121, Misses' Dresses

Oh how I loved every single beautifully matched stripe of each review I read on this pattern, then I tried it for myself and this is what happened. 


So horrible that I hate to even share this. Stripes running every which way. 


I loved this fabric and was actually saving it to make a wrap dress but figured it would be easy to match the larger stripes for this dress instead of a fabric with smaller stripes. As soon as I cut the bodice and saw that it was not matching I decided not to cut the skirt according to the pattern layout (I was honestly afraid of messing up even further). I cut the skirt with the stripes running horizontal in order to save fabric. I sewed it up to see how bad the damage was. A definite eyesore! 
So, I did my best to make the best of it, and used what leftover fabric I had to come up with this.. 
Just added a halter with stripes running vertical

I chose not to add elastic in the waist. 

Such a fun fabric and so comfy. 
 3rd up: 
A basic pencil skirt made from a deep blue Poly-Lycra Double knit from Fabric Mart. (My top is a Stitch Fix purchase from my July fix the 'Wynn Front Pocket Blouse'  Do you know about the stitch fix subscription service? If not check it out here
I didn't use a pattern just my waist and hip measurements. I also added a 3 1/2 inch band at the top but didn't get a picture of it. I took my hemline in 4 inches from my widest hip point to give it a slimmer/pencil skirt look.  


That's it! More later
NaTisha 

Wednesday, August 12, 2015

The most colorful frock: Butterick 5947 Review


Hey Y'all
Let me start by saying I love color, the louder the better, I always have. I have never been a "I love black, I love earth tones, I love muted colors" kind of person. With that being said this dress is one colorful frock and I almost second guessed myself after I had it made up. But, I threw it on and wore it anyway and I'm glad I did because I love it. I don't think its something I will wear a lot or very often because this is loud, bright and memorable but I do like the print and the pattern. On to the review.  

Pattern Description:  Dress has fitted, lined bodice variations with back princess seams, semi fitted skirt, back zipper and self belt. A: front tucks. B. side front button bodice. C. back slit. B and C: front princess seams.

Pattern Sizing: 8-24.  I made view C. I made the size 16 bodice and size 18 skirt which was a little roomy and I could have taken a bit of the roominess out of the skirt and probably will on my next go at this pattern. 

Did it look like the photo/drawing on the pattern envelope once you were done sewing with it? Yes, I believe so.

Were the instructions easy to follow? Instructions were not difficult at all to follow along. 

What did you particularly like or dislike about the pattern? No dislikes.

Fabric Used: Not sure of the fabric content. It is a woven with no stretch. Possibly a cotton jacquard or maybe even a twill. I didn't jot the content down when I purchased it, which I usually try and do.

Pattern alterations or any design changes you made:
I omitted the self belt, I lengthened the bodice by 1 inch. After basting the bodice together I determined I needed to take it in an additonl 3/8 of an inch.  
I believe the pattern calls for lining of the dress. I didn't line it. My material was thick enough to not require a lining, and I always wear half slips with my dresses when I wear them to church anyway.  
I used bias binding on the neck.  

Would you sew it again? Would you recommend it to others? I will be sewing this again. I love the princess seams on the bodice.
I am super proud of this invisible zipper and the matching intersecting bodice and skirt seams. 

Can you see that zipper?? No?? Ah ha! that's my point. 

 Just in case you don't understand....  I have finally mastered this invisible zipper installation and I'm so happy about it. I literally wanted to dance a jig looking at this picture again.


I like more of a "pencil skirt silhouette, not super tight but slim, so next time I will take a bit of the fullness out of the skirt.  


OK, so I couldn't resist. Decided to dance that jig for you anyway! 
 Conclusion: I love this dress. the princess seaming is probably my favorite thing, this can be as basic or as fancy a dress as you'd like it to be (in my opinion)

Have you tried this pattern yet? If so let me know what you think.
Talk with Y'all later.

Monday, August 3, 2015

African Wax Print Maxi skirt

Hey Y'all,
I am so very late to the Maxi skirt trend and honestly I don't know what I've been waiting on.
A pattern was not used on this one, although many patterns can be found out there for similar styles of skirts. I used my measurements along with Mimi G's Regal Maxi Tutorial which can still be found here and let me tell ya. I'm feeling mighty Regal in this one. The fabric I ordered from an online shop called Fabian and Mom which was suggested by a young lady from a sewing group I belong to. This was my first time sewing with a wax cotton fabric and honestly I'm not sure if I'm a fan of that type of fabric or not but I will try it again to be able to make a better judgement call.

Once i plugged my measurements in: waist, length and got the fabric cut out this was a simple one to get sewn up. I paired this with a top I blogged about before Simplicity1364.
I wore this lil number to church and received tons of compliments.    


I kept the length on this one pretty long and used a 1 inch hem because I will probably always have heels on with this one.


  Wish I would have thought to get a close up picture of the back because I'm getting pretty good at this invisible zipper thing.

What I continue to realize is that I really need to invest in a serger. I'm at the point where I want my garments to look a bit more polished on the insides. I just keep talking myself out of making the investment and continue to do a close zig-zag stitch on my seam allowances but that's not gonna cut it for much longer .

 
  I took my waist measurement for the waistband and added a inch for seam allowance  and the waist came out significantly too big so I had to add the belt, which I didn't love with the outfit but I wanted to wear this on this day so I made it work. You can see what I'm talking about if you look close.

I would have preferred my skirt to be a bit fuller but this was only 45 inch fabric and not 58-60 inch which I did not realize when I ordered this. Lesson Learned.
Overall I am really pleased with this skirt. I know how to tweak it for next time and I love that with a change of material I can make this for summer, spring, winter and/or fall.

Trying to tame all this material when a gust of wind blew by.


Have you guys made a maxi lately? Do you like them? Do they fit your style?
Talk with y'all later
NaTisha  

Wednesday, July 22, 2015

Black and White and all things right: M7099

Hey Y'all

First before we get into the review can I tell y'all how much I love this one here? I mean I really love it like for real for real love. I love this one so much that I have another one cut out waiting to be sewn up.
I wore this to a Conference that I was so blessed to be able to attend this weekend in Houston. The conference was Mimi Gs' Passion to Profit tour. The conference was informative, she was personable and informative and had an awesome friend/contributor Tieko Nejon who spoke on branding and marketing. I am not at a stage where I am ready nor interested in monetizing, branding or marketing but when I am I think I will be ready with the info they shared.
Funny Story.. Someone complimented me on my outfit, and of course I had to say "Thanks I made it!" Then she asked me what pattern? For the life of me I could not remember.. *insert funny here* another lady whom I had not met yet at this point speaks up and says "Oh its McCalls 7099. I turn and ask her "how do you know that? Does it look homemade?" (which would not have been a compliment) she explains no but she knew the pattern right away because she had made it recently. She takes out her phone and begins to share her pics and before you know it we are standing there looking at pics of our handmade garments from our phones oohing and awwwing like we are sharing pics of our beloved children.  Oh those memories still crack me up. *end of funny*


On to the review:
The pattern is 
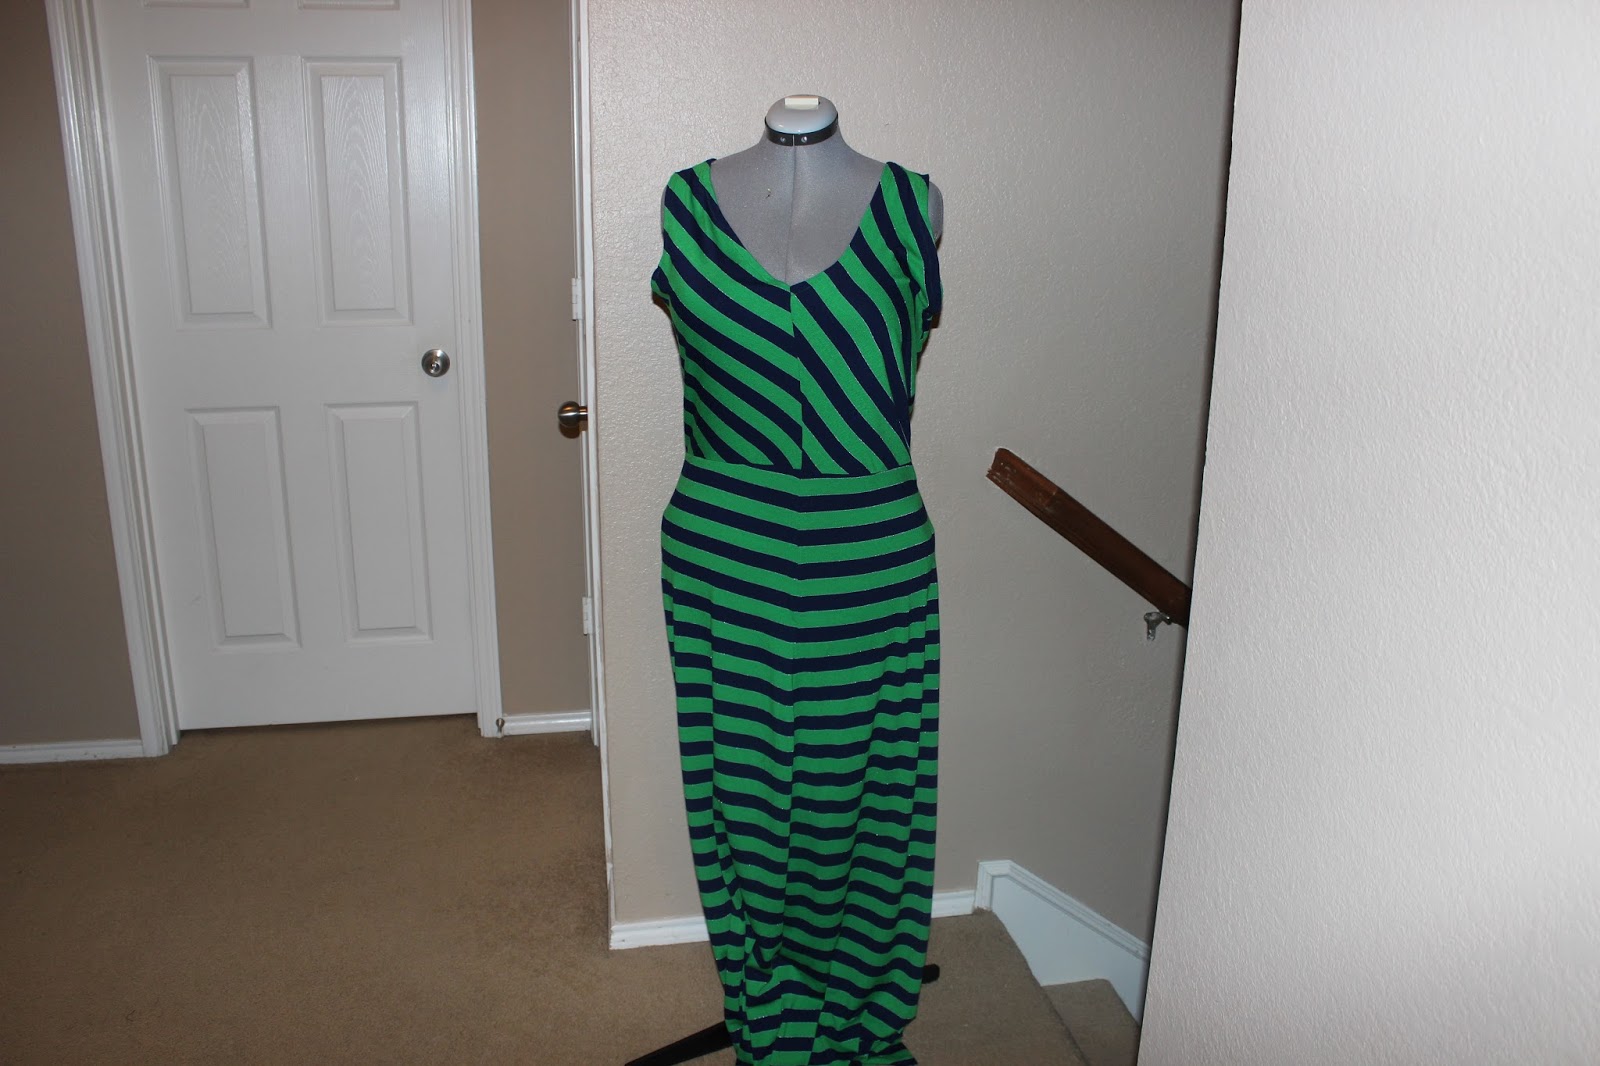
M7099 View C. A misses jumper/romper with tapered legs.

Pattern Sizing: I cut the 14. I Could have easily gotten away with a 12 but the 14 was the smallest in my pattern envelope.

Were the instructions easy to follow? Instructions were simple enough. Nothing very difficult if I recall correctly. I made this back in May but just had the opportunity to wear it now.

What did you particularly like or dislike about the pattern? Love that it was simple to assemble. There were only 6 pattern pieces

Fabric Used: I used a black/white/Grey knit I purchased from JoAnns back in January.

Pattern alterations or any design changes you made: 
- The bodice was very roomy and I ended up taking in an additional inch on each side seam.
- I used 3/8 elastic at the waist instead of the 1/2 suggested.
- The underarm is very low and will show bra strap if a narrow hem is done. I chose to finish the raw edge and only turned under once.  Next time I make it I will raise armhole probably 1/2 inch or so.
-I made an almost fatal rookie mistake near the end of completing. I was trimming my pants seams. I was not going to finish the seams because its knit and wouldn't ravel. I don't yet have a serger and didn't want to take the extra step of finishing on my machine like I normally do (being lazy) I cut a about a 2 inch gash in one pants leg. I was horrified, like almost near tears horrified. I decided to just narrow the pant as much as I could to hide the tear..so I took both pants legs in the same amount,  and honestly you cant really tell the difference in my opinion.

Would you sew it again? Would you recommend it to others? Yes. I already have it cut out. 

Conclusion: Well you know by now. I love it.
I didn't get the chance to take many pictures of this one, but you'll be seeing it again I'm sure.


The only picture I got with Mimi G. and my eyes were partially closed and my turkey neck was showing. Oh well!
Talk with y'all soon.
NaTisha

Monday, July 13, 2015

Simple black blouse: Simplicity 1364

Hey Y'all

This is such a simple plain black top that its almost not worthy of its own blog post. Wait a minute... Anything I start, complete and wear is worthy of an individual blog post because if I was going to be completely honest recently its been far and between (is that how the saying goes?) since I could post something wearable.

Anyway, I needed a simple black top that I could pair with a skirt to wear to a midday wedding. This was a purchased skirt from F21 a couple years back that I never wore because 1. I bought it for church without trying it on then realized the under slip was too short and sheer and 2. I just didn't have a simple shirt to pair it with.

My first fix was the skirt. I had to cut out the sheer, thin, short slip that was attached to the skirt. The attached slip barely covered my bum, and although probably really sexy on someone else Im not about that life. So I took a black slip I had on hand ( I buy slips anytime I am at a thrift store and they are cheap) and stitched it to the underside of the skirt waistband. PROBLEM SOLVED

Second, was the top Simplicity 1364
  I made the size 16 in a black Peachskin. This fabric was originally $9.99 but was on sale for 30% off and I used an additional 20% of coupon so this top cost me a little over $6.

Initially, I wasn't sure about the neckline but after it was complete I really liked it. Like the pattern envelope suggested this top sews up in a "Jiffy". There are only 4 pattern pieces the front, back, and 2 facings.
The waist/bottom of the top was tight and narrow, I couldn't pull it all the way over my hips but where it stopped was fine for me. I cut the back on the fold and had a back center seem choosing to omit the lapped back zipper. The underarm was a bit too tight for my liking and I knew it would get irritating after wearing for awhile so I snipped out 1/2 inch from the underarm from the notch to edge.  This gave me the perfect amount of ease I needed.

Dressform Pics:
Front


Back 

Neck

How I paired it: 


I really liked this top and can see myself making this as a simple shell to go under blazers and jackets in the cooler months. 

Talk with yall soon. 
NaTisha
      

Tuesday, June 16, 2015

Feeling Meh..about this one. Kwik Sew 3229.

Hey Y'all


I decided to sew up a pattern that I hadn't sewn before so I reached for OOP Kwik Sew 3229. It looked simple enough.. My plans were to narrow the legs quite a bit and maybe add elastic to make them joggers.. here's what happened.
Kwik Sew 3229 and a camouflage poly-cotton blend from Hancock's

I used the size XL. This pattern calls for a stretch fabric. I did not use a knit so I decided to use the largest size in the envelope. I narrowed each pant leg on inner and outer seam by 1 inch . That resulted in the pants still being fuller than I desired. I took off an additional 1/2 inch or so on each side but for some reason I only did this to front pant leg. So.. the back pant leg was much fuller than my front. But I think it would have been anyway minus my mix up with the adjustments cause it was like a major difference between the front and back pant legs. At this point I decided not to make them joggers and leave them as is.
I lengthened the bodice by three inches.
I swear the sun will just not cooperate with me. I squint in every single picture.

Instead of cutting the back on the fold I cut two pieces and added an exposed zipper
It looks like my right leg is off grain and the pattern is running upwards. Its not.. I had just adjusted the belt I had on and the waist was caught underneath the belt.


Per the pattern instructions the SA was to be 1/4. I used a 5/8 in the bodice area and about 1 1/2 in the seams of the pants to take away a bit more of the fullness. 
I opted not to do a fabric belt and used a 1 inch elastic instead of the 3/8 as instructed in the instructions. 

This was a $2.50 poly-cotton blend fabric and I initially was just using this as a muslin and although I don't love it, I decided to wear it out this day for lunch anyway. 

The bodice does have a front and back facing and I really liked that. So no bias binding or narrow hem at neck and arms. 
This wasn't a terrible pattern but its also not one Ill probably be running back to either. The wide legs are just too much for what I wanted in this particular jumper. 

   
This is me signing off! 

Talk to y'all later, 
 NaTisha   

Monday, June 8, 2015

My Sunday Blues

Hey Y'all

This pattern is an oldie.. McCalls 6700. If I knew how easy it was to whip up, I would have made this a long time ago. I started on Friday, completed on Saturday and wore to church on Sunday. There are only 5 pattern pieces required in order to make this dress. and y'all know me... One day I will kick the habit of going the easy route but for now it works for me. Making simple, uncomplicated pieces works for both my time and my wardrobe lifestyle.  

I used this blue/White/Teal spandex knit that I have had for probably 2 or 3 summers. I cant recall where it was purchased from.


The first thing I did was change the back up a tad bit. I wasn't fond of the the long ties in back. I widened each tie (there were originally 2) by 1/2 inch to make easier for turning once I attached them I didn't like the way they looked or hung. So I removed one all together, shortened the other and tacked to the other side of the shoulder.


I  ended up tacking both the front and back bodice down to eliminate the gaping. It was a simple fix and it worked but I still decided to wear a thin cami underneath just in case.


Other than the back straps and tacking the bodice closed I didn't make any other alterations. WHEN I make this again I will probably lengthen the bodice by an inch or so, the bodice was just a little short for my taste.

This was really a fun dress to make up. I could honestly have a ton of these in a bunch of pretty wild prints for summer. The one thing I may do differently when I make this up is to change the back bodice to a one panel cut on the fold back. Other than this I would keep everything exactly the same.

That's it for now. If you haven't made this one up yet, you should!

I'm looking at my pattern catalog and I'm thinking a one piece jumper is in my near future.
Have a Great week. Talk to y'all later!
NaTisha

Monday, June 1, 2015

My final Me-Made of 2015

Hey Y'all!
I didn't quite achieve my goal of 10 Me-Made items for for May. But, I squeaked by with 8 and for me that is a HUGE accomplishment. Granted some of these things were made previously and I just had never gotten around to wearing them. Some things I did make in May  I didn't get a chance to wear but will be able to share later.
Anyway here is a fun little skirt I wore the other day.
 
This fabric is so busy but perfect for summer. I purchased this fabric from my local Jo Ann's (ironically last May)

No pattern used. Its an easy circle skirt drafted according to my measurements


Although I didn't make all 10 items that I set out to make at the beginning of May I'm still pretty pleased with myself.

  That's it until next time.
Talk to y'all later
NaTisha